waterRIDE™ allows the user to export the main map window to a picture file, using the Export View tool. This tool saves the image on the main window to either a windows meta file (.wmf), bitmap image file (.bmp), or JPEG (.jpg) ready for use in external applications.
Exporting a Single View
To export view, select Tools->Export->Export View. Alternatively, pressing F12 brings up the Export View save file form with the filter set to Custom JPEG image.
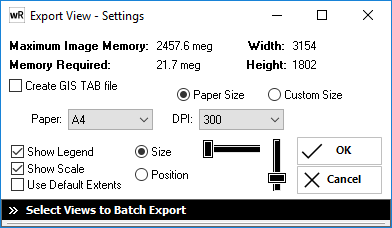
Create GIS TAB file: When exporting the image, save GIS registration details in both a *.tab and *.jgw file suitable use in GIS applications.
Custom Size: Use the scrollbar to adjust the size of your image in terms of desired output quality.
Paper Size: Specify the output paper size and desired print resolution (Dots Per Inch (DPI)).
The legend and scale visibility can be toggled on/off by ticking/unticking the respective boxes.
The size and position of the legend can be set using the relevant horizontal and vertical scroll bars.
Use default extents will reset the view to the default extents prior to exporting the image. Leaving this unticked will not change the view extents from their current values.
The memory required for an uncompressed (bitmap) image is displayed at the top of the form, along with the image dimensions. waterRIDE™ automatically calculates the maximum allowable size of the image for your system configuration.
Batch Exporting Multiple Views
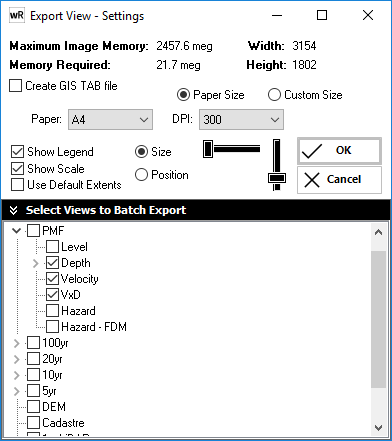
Multiple views can be exported by selecting the desired views in the lost after clicking the "Select Views to Batch Export" panel button. All views will be exported using the settings on the form and the view extent will be locked to the same as the currently active view, unless the Use Default Extents box is ticked. In this case, each view will revert to its default extents.
Each view will be exported as the full view path with a "-" between view names, and saved in the same folder as specified when entering the tool. For example, 100yr-Depth.jpg. You may need to ensure that the output filenames will be unique.