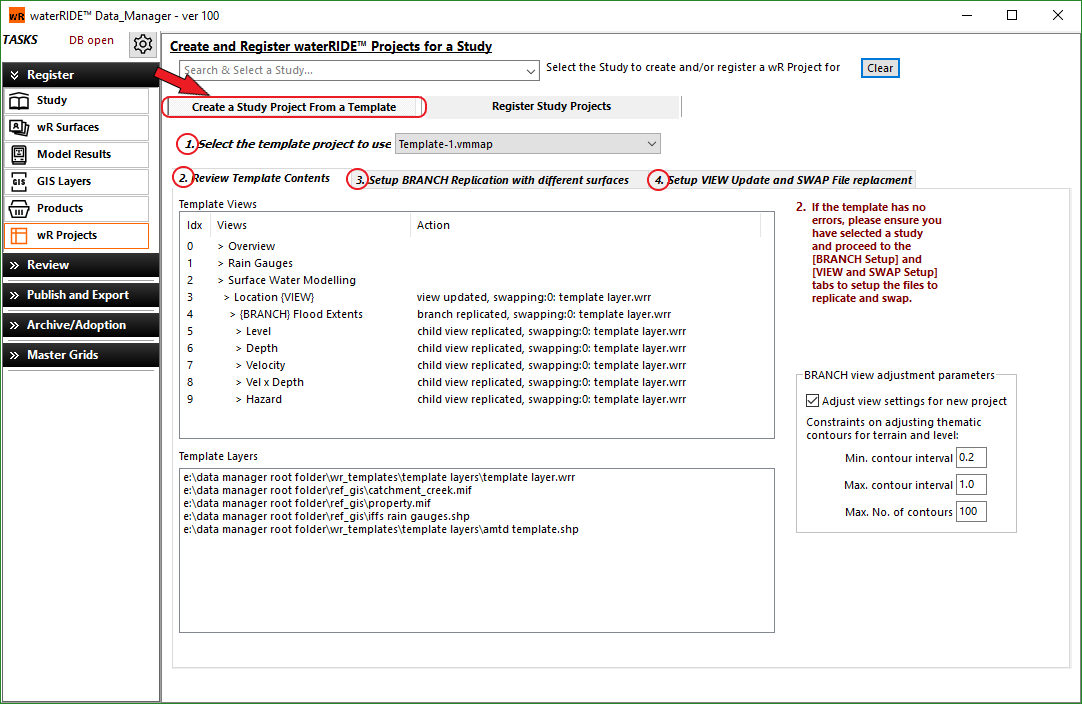
To create a New waterRIDE project using a pre-made template file, the user must complete all 4 sections using the form below:
Using this tool the user can choose an existing waterRIDE project to use as a template for generating a new project whilst swapping key surfaces or GIS files. The tool allows users to pick any of the registered surfaces or GIS files in the Data Manager database to build the new project. The tool will automatically adjust color palate scaling to suit the newly swapped surfaces based on the parameters specified.
Before proceeding through the four steps, users must select the appropriate study to register the waterRIDE project to using the Search & Select a Study box at the top of the form.
1.Select the template project to base the new project on. This drop down menu will list all projects currently registered within the Data Manager database.
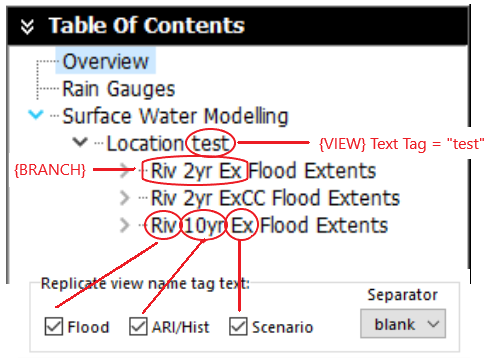
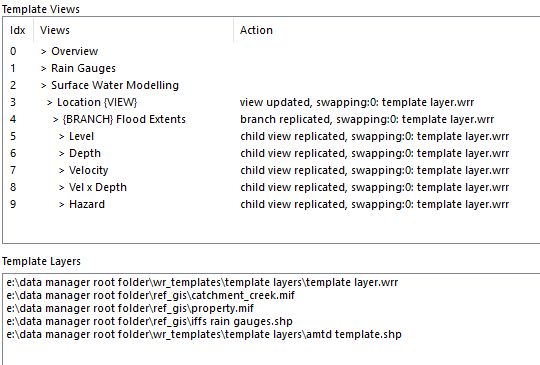
2.Review the template contents using the table in the center of the form. The Template Views window lists all of the different view panes listed within the project file with headings and current template actions for each view. The {VIEW} value (next to index #3 in example below) will be automatically generated based on the settings in section 4. Whereas the {BRANCH} value is generated using the inputs from section 3.
The Template Layers table will list the filenames and locations of all layers included in the currently selected project template.
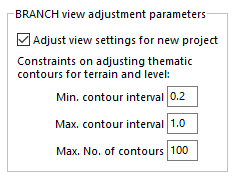
The template tool has the ability to automatically adjust level and terrain contour scaling autonomously to cater for varying sized flood events as well as centering the view to the chosen surface. The user can control the parameters of this feature using the menu to the right of the form. To fix the scaling and view settings as specified in the selected template simply uncheck the Adjust view settings for new project button (this is checked by default). If checked the user can adjust the minimum and maximum contour intervals along with the maximum number of contours.
Note: A VIEW is typically defined by a particular model catchment or study area for example: "Sandy Creek Catchment". A BRANCH will be a defined flood event and scenario for example: "Riv 2yr Ex" (This branch format will be explained further in Section 3).
3.The next step is to select the 3. Setup BRANCH Replication with different surfaces tab. This menu is used to specify which surfaces are used to be swapped into each new BRANCH using the template. The user also has the ability to define the automated BRANCH naming convention using the meta data from the selected surfaces. To load the list of surfaces make sure the desired study has been selected at the top of the screen and press the ![]() button.
button.
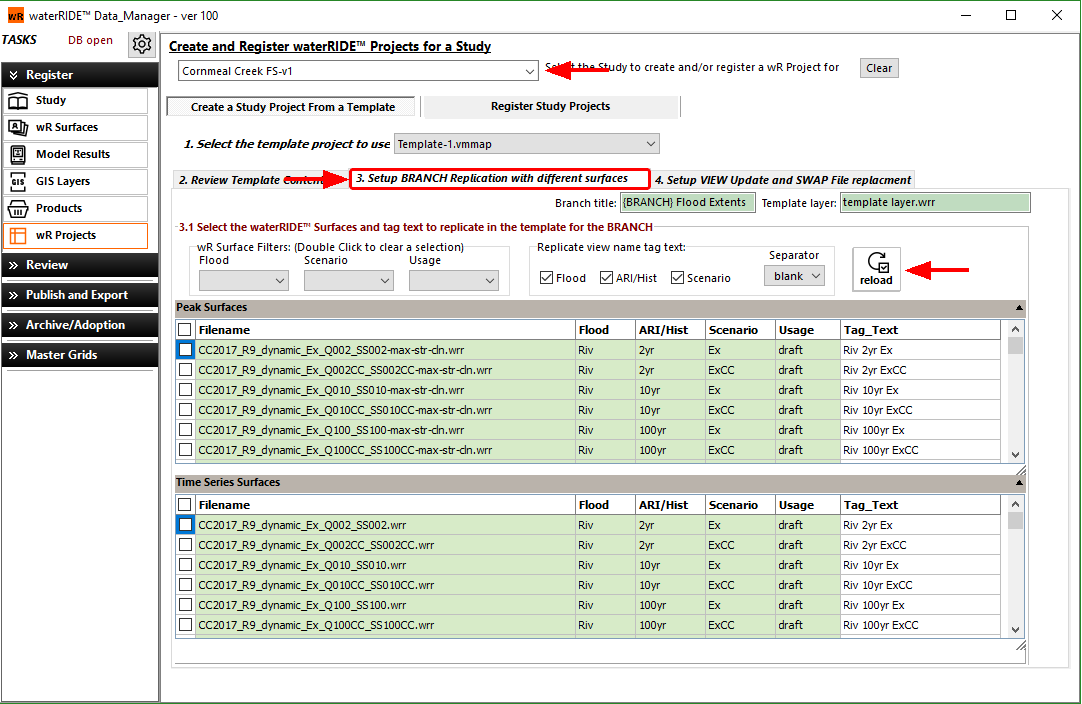
For large studies with multiple model scenarios, the surface lists can be filtered using the wR Surface Filters drop down options. This will filter the Peak and Time Series surface lists based on the meta data applied during the registration process. If there are any errors with this meta data it can be modified using the Study Contents menu.
Select the surfaces you wish to use to build the project. Each surface selected will have it's own branch within the project. The Branch title will be based on the value in the green box at the top of the form with the {BRANCH} text replaced with the value in the Tag_Text column shown in the table. For the example below, the selected surface will have its own branch in the project titled: "Riv 2yr Ex Flood Extents"
![]()
The tag text can be modified using the options above the tables. Simply check on or off which meta data values and select an appropriate separator value to be used in the Branch Title. To update the Tag_Text values with the changes made simply press the ![]() button. Once decided on the project surfaces and Branch title layout the next step is to swap any other GIS files as necessary to complete the project.
button. Once decided on the project surfaces and Branch title layout the next step is to swap any other GIS files as necessary to complete the project.
4.Select the 4. Setup VIEW Update and SWAP File replacement tab. This section is where the location tags ("Tag_Text" input) and GIS reference layers can be exchanged from the template file. I.e. in the example below, the "catchment_creek.mif" GIS file used in the template project can be swapped out for the appropriate Cornmeal Creek catchment GIS layer for the project. This layer would have already been registered using the GIS Layers menu.
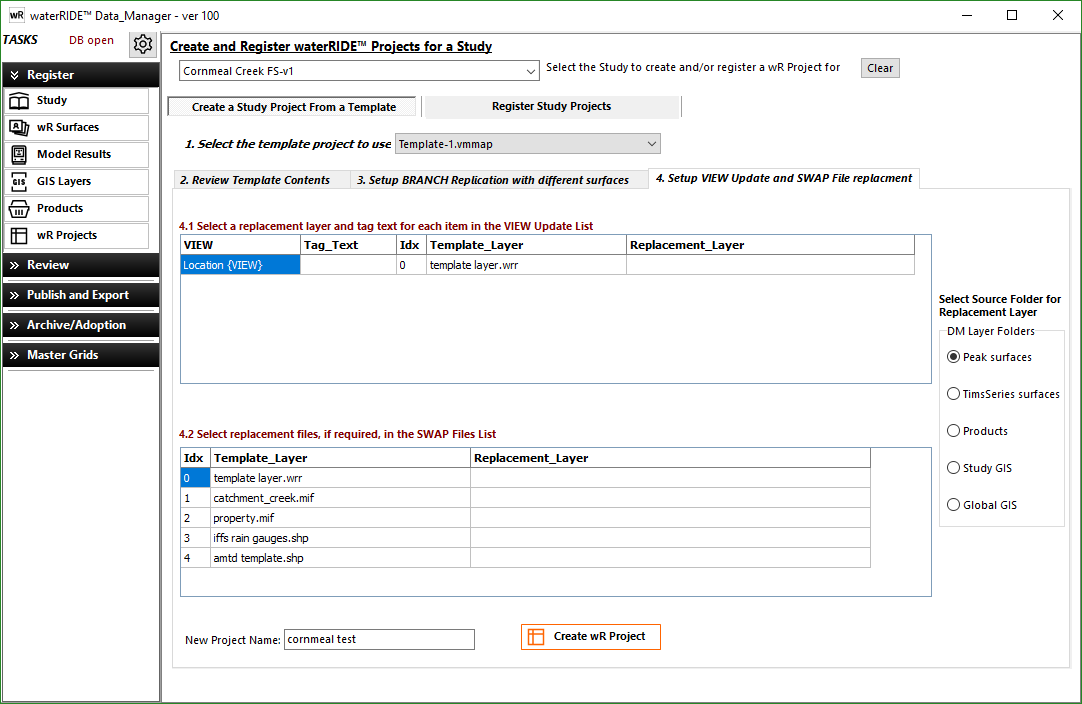
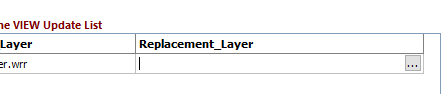
To select a layer to swap, click on the blank box under the "Replacement_Layer" heading and press the "..." icon and browse for the desired file.
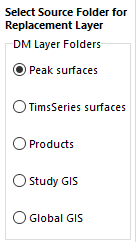
The radio buttons to the right will assist the user in filtering which Data Manager folder location is opened for browsing. For the peak and time series surfaces, Data Manager will automatically jump to the the specific flood study folder location.
Once each of the desired location tag and replacement layers have been specified, the user can specify the name of the project in the lower part of the form and press ![]() to create the project.
to create the project.
The new project file will now be listed in the Register wR Project section ready for registration.
Below is an example of a project contents created using the template shown above: