InfoWorks RS and ICM follow a similar process for conversion into waterRIDE™. The only way to import InfoWorks results into waterRIDE™ is to first export them from within InfoWorks into generic CSV or Binary files. Using Binary Files is preferred, as the process is significantly faster, although some versions of InfoWorks ICM may crash when exporting binary results.
With waterRIDE 10, support for piped flow (and integrated pipe/surface flow) was introduced.
There are two input types required to convert InfoWorks results to waterRIDE™:
Once exported, results can be converted into waterRIDE™ format using the conversion forms.
Model results can be exported in either CSV format or in binary format. Binary format is preferred as it is significantly faster.
Drag and drop the relevant simulation result file into the Geo Plan window in InfoWorks. Select either “CSV Export…” or "Export to Binary Files" from the Results Menu in the main menu bar, where available:
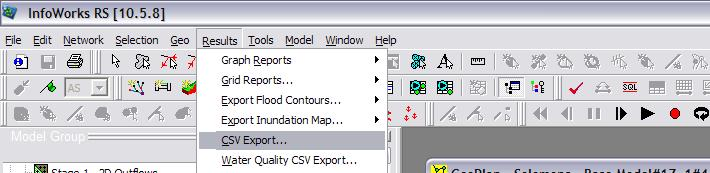
Exporting Results From InfoWorks RS
Depending on the software version, the Export Window “CSV Export…” will look like the following:
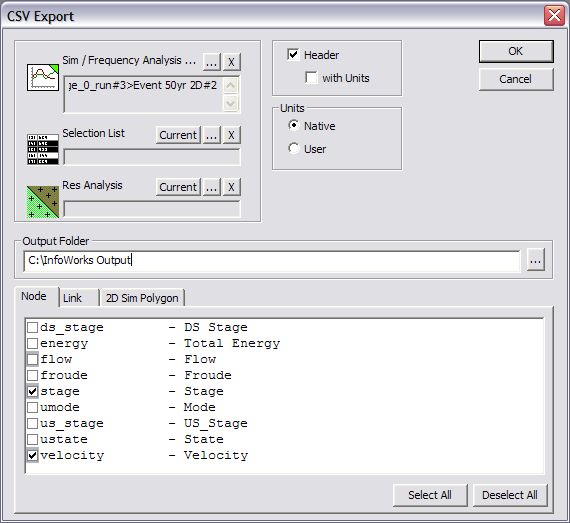
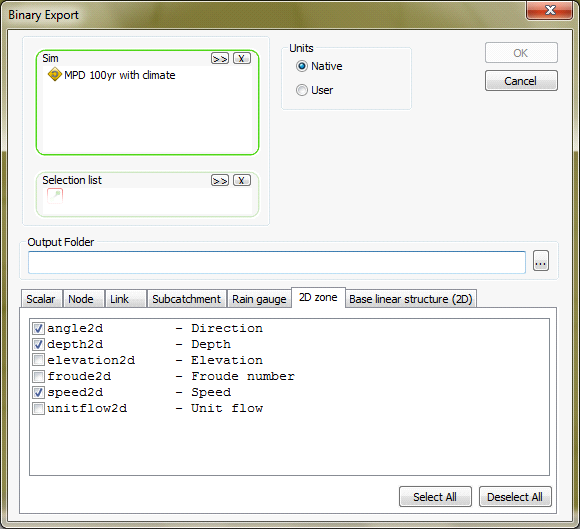
Drag and drop the relevant simulation results file into the “Sim /Frequency Analysis….” Window. Direct the results to your folder of choice in the “Output Folder”. Then under the Nodes tab select “stage” and “velocity” (as shown above). Under the 2D Sim Polygon tab select “angle2d”, “depth2d”, and “speed2d” (you may need to scroll down to see this one) as shown below (note that "elevation2d" is no longer required):
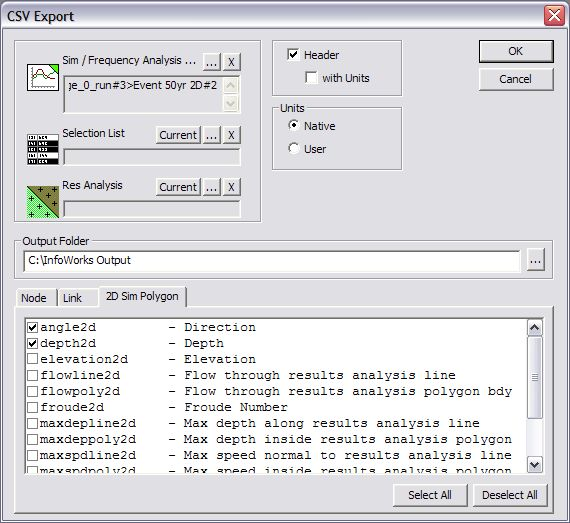
Once you have selected these items click “Ok” and the results will be exported to the specified CSV/Binary file.
InfoWorks ICM
Depending on the software version, the Export Window “CSV Export…” will look like the following:
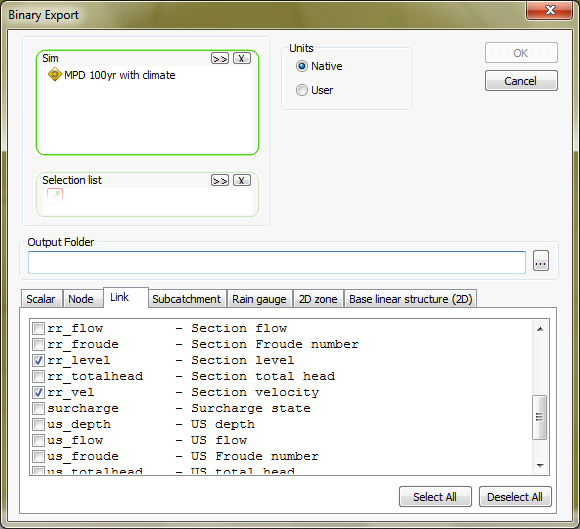
Drag and drop the relevant simulation results file into the “Sim /Frequency Analysis….” Window. Direct the results to your folder of choice in the “Output Folder”.
1D Channels:
Under the Links tab select “rr_level” and “rr_velocity” (as shown above).
2D Regions:
Under the 2D Sim Polygon tab select “angle2d”, “depth2d”, “speed2d” and elevation2d as shown below (you will note that elevation2d is required to avoid deriving levels from "averaged" depths):
Piped Flows:
Ensure that "depnod", "ds_flow" and "ds_vel" are selected.
Once you have selected these items click “Ok” and the results will be exported to the specified CSV/Binary file.
To export network data out of InfoWorks RS/ICM, right click on the relevant network file, select Export->“To CSV…”.
In the window that pops up make sure the following options are checked/selected:
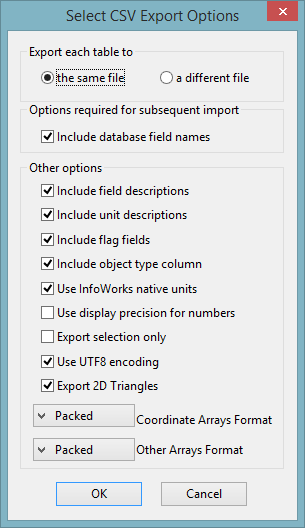
Note that the option to export each table to the same file should be selected, otherwise these will need to be combined prior to conversion.
If you are using an older version of InfoWorks RS (v10 and earlier), and the Export 2D Triangles option is unavailable, you will also need to export the 2D network triangles as a GIS file. To export this GIS file, right click the relevant network and under the Export option select “To MIF”. In the “Browse for Folder” window that pops up direct it to the desired folder and press “OK”. This will export all the components of the network to MID/MIF files. In the folder the files have been exported to delete (if you do not want them for something else) all the MID/MIF files except “iw_2dtri.MID” and “iw_2dtri.MIF”.
InfoWorks RS/ICM:
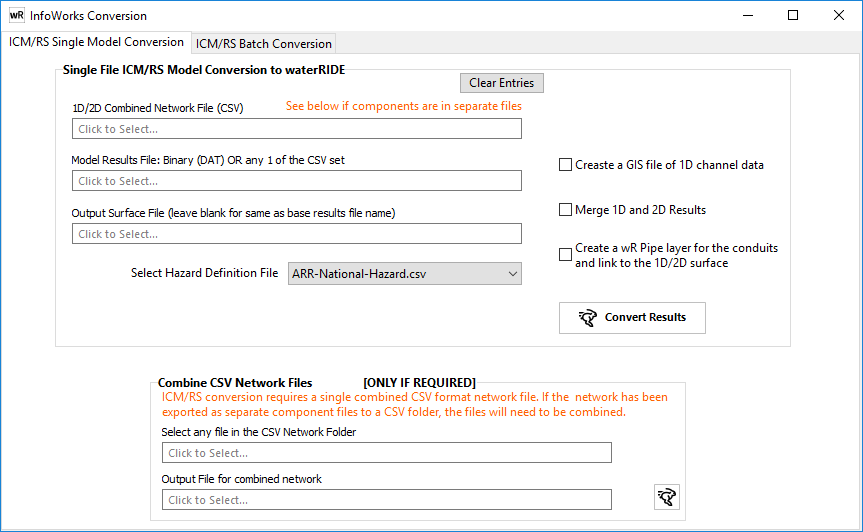
Newer versions of InfoWorks RS/ICM results can be converted from the same waterRIDE™ form:
waterRIDE now automatically joins:
- 1D reaches to 2D zones
- 1D junctions
- 1D pipe networks
- 1D to 2D junctions
1) If the network components were exported to separate files, you must first combine them into a single CSV using the "Combine" tool (bottom of the form above).
2) Specify the location of the combined network CSV file and model results exports (either a binary DAT file or any one of the CSV files).
3) Specify the location to save the waterRIDE™ file. If left blank, the output file will default to the same name as the base results files.
4) Select Hazard definitions files to use
5) Specify if you want a GIS layer of the 1D channel layout to be created. This will include any artificial (interpolated) cross sections required to join the 1D reaches laterally to the 2D domain.
6) Specify if 1D and 2D domains should be joined. If true, waterRIDE will automatically insert artificial cross sections between actual cross sections to align with the left and right InfoWorks bank lines. In this way, the 1D and 2D domain extents will align. The figure below provides an example of the automatic stitching.
7) Specify if a waterRIDE pipe layer (wrp) is to be created for any conduits. This will be automatically linked to the 2D surface when the pipe layer is made active in a view.
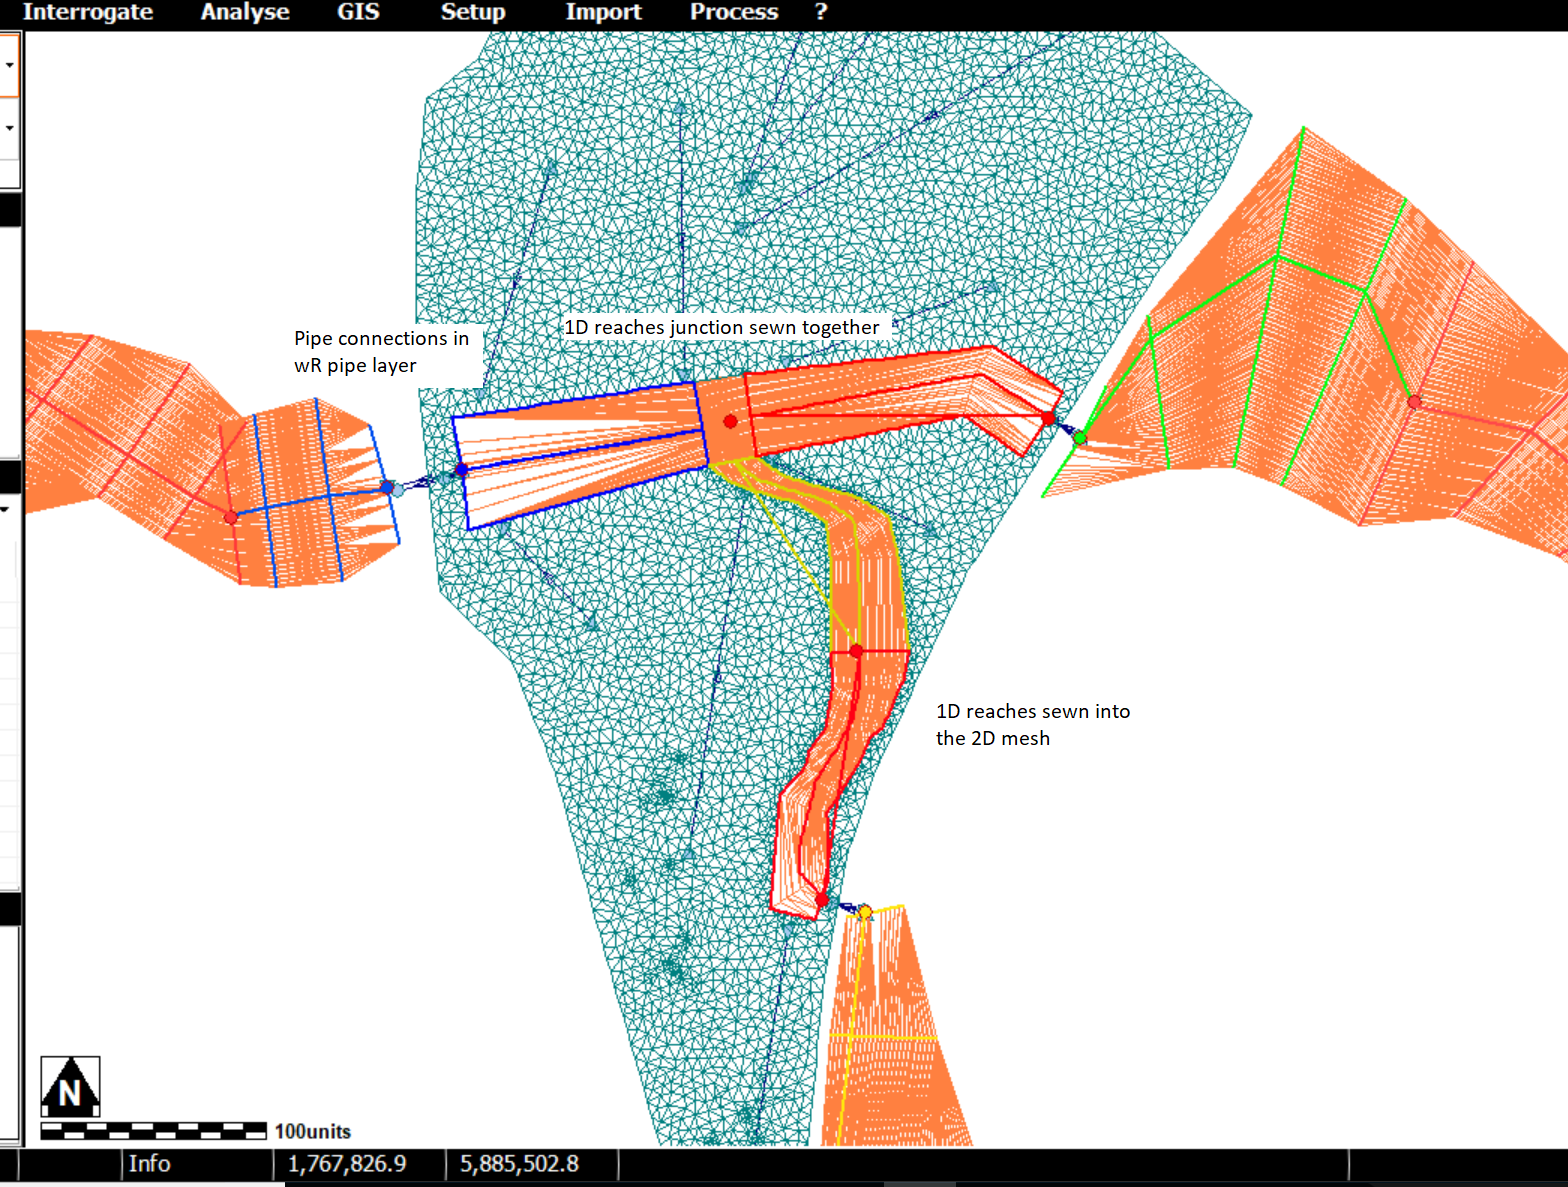
InfoWorks 1D/2D Automatic Stitching.
Conversion can be batched using the Batch Conversion tab:
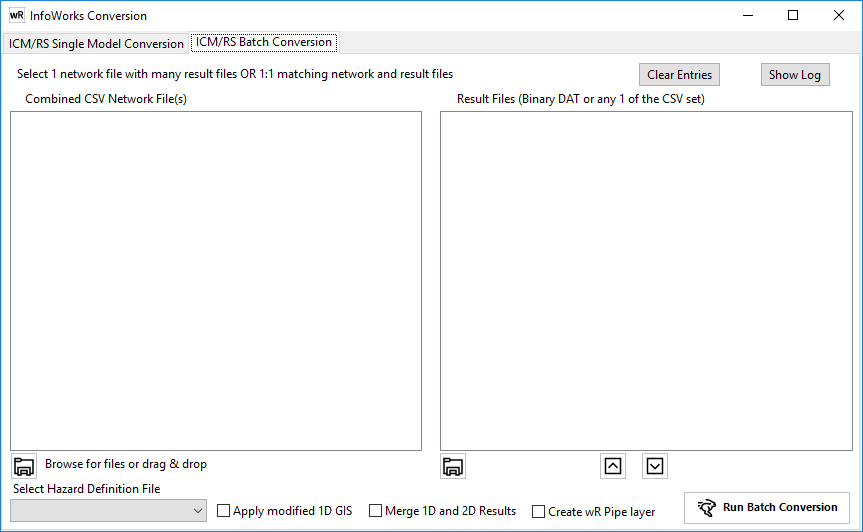
1) Add a CSV network export to the left hand list
2) Add the one of the CSV exports or the Binary DAT export corresponding to the model network CSV
3) Select whether to merge the 1D/2D networks or to use the 1D XSect GIS file to edit 1D cross sections during processing
4) Repeat as necessary.
5) Click Run Batch Conversion